2017年8月9日 星期三

Install Zookeeper & Kafka On CentOS6

環境
Test-Kafka01    192.168.1.61
Test-Kafka02    192.168.1.62


服務 
Zookeeper 管理kafka , 同步檔案
Kafka         分散式資料叢集  


1. 安裝Java 1.8 


yum install java-1.8.0-openjdk.x86_64 -y

2. Zookeeper下載及解壓縮


wget http://ftp.mirror.tw/pub/apache/zookeeper/zookeeper-3.4.8/zookeeper-3.4.8.tar.gz

tar -zxvf zookeeper-3.4.8.tar.gz -C /var/

3. 配置Zookeeper設定檔


vi /var/zookeeper-3.4.8/conf/zoo.cfg

tickTime=2000  
initLimit=10  
syncLimit=5  
clientPort=2181  
dataDir=/opt/zookeeper  
server.1=Test-Kafka01:2888:3888  
server.2=Test-Kafka02:2888:3888 


4. 配置Hosts

新增至兩台主機的/etc/hosts


192.168.1.61 Test-Kafka01
192.168.1.61 Test-Kafka02


5. 新增Zookeeper資料夾 & myid


mkdir -p /opt/zookeeper

(第一台)
echo "1" > /opt/zookeeper/myid

(第二台)
echo "2" > /opt/zookeeper/myid


6. 啟動zookpeer


/var/zookeeper-3.4.8/bin/zkServer.sh start

7, 檢查zookeeper是否正常啟動


/var/zookeeper-3.4.8/bin/zkServer.sh status
(回應 Follow 或是 Leader就是正常啟動)

(第一台)
/var/zookeeper-3.4.8/bin/zkCli.sh -server 127.0.0.1:2181

(建立mytest1目錄)
create /mytest1 test

(檢查mytest1是否存在)
ls /

(第二台)
/var/zookeeper-3.4.8/bin/zkCli.sh -server 127.0.0.1:2181

(檢查mytest1目錄是否同步到第二台)
ls /

8. kafka下載及解壓縮


wget http://apache.stu.edu.tw/kafka/0.10.2.0/kafka_2.12-0.10.2.0.tgz

tar -xzf kafka_2.12-0.10.2.0.tgz -C /opt


9. 建立kafka軟連結 及修改權限


cd /opt

ln -s kafka_2.12-0.10.2.0 kafka  

useradd kafka

chown kafka kafka


10. 配置kafka設定檔


vi /opt/kafka/config/server.properties
(修改下列設定)

broker.id=1            # 唯一,填数字,本文中分别为1 , 2
prot=9092            # 这个broker监听的端口 
log.dir=/data/kafka-logs  #  该目录可以不用提前创建,在启动时自己会创建
zookeeper.connect=192.168.1.61:2181,192.168.1.62:2181 #这个就是zookeeper的ip及端口
num.partitions=16         # 需要配置较大 分片影响读写速度
log.dirs=/data/kafka-logs # 数据目录也要单独配置磁盘较大的地方
log.retention.hours=168   # 时间按需求保留过期时间 避免磁盘满

11. 啟動kafka


/opt/kafka/bin/kafka-server-start.sh /opt/kafka/config/server.properties


2017年7月24日 星期一

Extend Disk in Centos7 with XenServer or VMWare

背景設定

1. 硬碟=50GB

2. 分區如下使用LVM

/boot   500 MiB
swap   2048MiB
/          102400 MiB
/data   其他

3. vg-group name = centos

4.擴展/data空間    , data 的位置為 /dev/centos/data


新增硬碟大小


將VM主機關機後 , 硬碟新增至100GB , 啟動主機


確認硬碟大小是否有增加


#fdisk -l /dev/xvda


格式化新增的空間


#fdisk /dev/xvda 

#n  (新增分區) 

#p  (primary) 

#3   (假設為xvd3 ,也可直接enter)

#t  (修改格式)

#8e  (LVM的格式)

#3  (選擇修改格式的分區)

# w  (存檔)


擴展VG空間


#vgextend centos /dev/sda3


檢查VG空間是否增加


#vgdisplay


擴展data lvm空間


#lvextend -L +50G /dev/centos/data

#xfs_growfs /dev/centos/data


檢查/data是否已經擴展空間


#df -h 


2017年7月16日 星期日

Set up Gre Tunnel with ddos protection on Centos 6 - AWS EC2 (二)

環境


對外防禦IP  49.x.x.x
廠商 gre public ip 106.x.x.x
廠商 gre pravite ip 10.10.10.1
本機 gre pravite ip 10.10.10.2
本機 gre public ip   98.x.x.x (ec2 EIP )
本機eth0 192.168.1.64
後端主機eth0 192.168.1.184


為了讓玩家透過對外防禦IP 49.x.x.x 訪問Gre Server後端的實際主機 (192.168.1.184)
需要透過iptables DNAT,SNAT,FORWARD來達到同進同出的效果


1. 允許ip fordword

vi /etc/systcl.conf

#新增
net.ipv4.ip_forward=1 


2. 使ip_forward生效

systcl -p


3. 配置iptables 

(預設fordward Accept ,所以不用配置規則)

vi iptables.sh


#清空設定
iptables -X
iptables -F
iptables -Z
iptables -t nat -X
iptables -t nat -F
iptables -t nat -Z

#input , output , forward 預設Accept
iptables -P   INPUT ACCEPT
iptables -P  OUTPUT ACCEPT
iptables -P FORWARD ACCEPT

SNAT讓封包正常回到gre tunnel
iptables -t nat -A POSTROUTING -o eth0 -j SNAT  --to-source 192.168.1.64

#  DNAT-讓訪問對外防禦IP 49.x.x.x:81的封包,目的端轉址為192.168.1.184:80 
iptables -t nat -A PREROUTING -p tcp -d 49.x.x.x/32 --dport 81 -j DNAT --to-destination 192.168.1.184:80


4. 執行iptables shell

sh iptables.sh


5. 開機啟動

#存檔/etc/sysconfig/iptables
/etc/init.d/iptables save 

#開機啟動
chkconfig iptables on


6.實現同進同出

#新增ip rule
/sbin/ip rule add from 192.168.1.184 lookup gre


Set up Gre Tunnel with ddos protection on Centos 6 - AWS EC2 (一)

環境

對外防禦IP  49.x.x.x
廠商 gre public ip 106.x.x.x
廠商 gre pravite ip 10.10.10.1
本機 gre pravite ip 10.10.10.2
本機 gre public ip   98.x.x.x (ec2 EIP )
本機eth0 192.168.1.64
後端主機eth0 192.168.1.184

為了和廠商建立GRE Tunnel , 並綁定對外防禦IP到loopback

1. 開啟GRE 模組

modprobe ip_gre


2. 開機啟動GRE模組

echo "/sbin/modprobe ip_gre > /dev/null 2>&1" > /etc/sysconfig/modules/ip_gre.modules && chmod 755 /etc/sysconfig/modules/ip_gre.modules


3.配置tunnel 網卡

vi /etc/sysconfig/network-scripts/ifcfg-tun0

DEVICE=tun0
BOOTPROTO=none
ONBOOT=yes
TYPE=GRE
PEER_OUTER_IPADDR= 106.x.x.x (廠商gre public ip)
PEER_INNER_IPADDR=10.10.10.1 (廠商gre prative ip)
MY_INNER_IPADDR= 10.10.10.2 (本機 gre prative ip)
MTU=1476


4. 啟動網卡 

    ifup tun0


5. 測試gre tunnel 是否連線成功

ping 10.10.10.1
(如果通了 gre tunnel 就建立成功)


6. 配置對外防禦IP在 loopback上   

vi /etc/sysconfig/network-scripts/ifcfg-lo:0

EVICE=lo:0
IPADDR= 49.x.x.x (對外防禦IP)
NETMASK=255.255.255.255
NETWORK= 49.x.x.x (對外防禦IP)
BROADCAST= 49.x.x.x (對外防禦IP)
ONBOOT=yes
NAME=loopback


7. 配置對稱路由 (symmetric routing)

vi /etc/iproute2/rt_tables

#新增 routing table
200 gre

8. 新增ip rules , 讓對外防禦IP從tun0 出去 , 並達成同進同出

/sbin/ip rule add from 49.x.x.x lookup gre
/sbin/ip route add default via 10.10.10.1 dev tun0 table gre


....待續


2017年6月30日 星期五

PXE Server ON CentOS7

目標:


1.將PXE 服務安裝在CENTOS7上


2.提供CentOS6 , CentOS7客製化安裝


利用 yum 安裝 tftp Server、DHCP Server、Vsftp Server 以及 syslinux 等套件:


#yum install tftp-server dhcp syslinux vsftpd -y

配置dhcp.conf

#vi /etc/dhcp/dhcpd.conf

ddns-update-style interim;
ignore client-updates;
authoritative;
allow booting;
allow bootp;
allow unknown-clients;

#想配發的dhcp範圍
subnet 192.168.x.0 netmask 255.255.255.0 {
  range 192.168.x.10 192.168.x.100;
  option domain-name-servers 168.95.1.1, 8.8.8.8;
  option domain-name "internal.example.org";
#dhcp gateway
  option routers 192.168.x.x;
  option broadcast-address 192.168.x.255;
  default-lease-time 600;
  max-lease-time 7200;
#PXE Server
  next-server 192.168.x.x;
  filename "pxelinux.0";
}


修改 tftp 套件內容:

 /usr/lib/systemd/system/tftp.service

[Unit]
Description=Tftp Server
Requires=tftp.socket
Documentation=man:in.tftpd

[Service]
ExecStart=/usr/sbin/in.tftpd -s /tftpboot  ##修改本行至tftp家目錄
StandardInput=socket

[Install]
Also=tftp.socket


將 syslinux 檔案,複製到 tftp Server 分享目錄內:

#cd /usr/share/syslinux
#cp pxelinux.0 menu.c32 memdisk mboot.c32 chain.c32 /tftpboot/
#chmod 644 -R /tftpboot
#chmod 755 /tftpboot


 Linux OS ISO 檔案內容,複製到 vsftp 分享目錄上:

#mkdir /var/ftp/pub/centos7.2_1511_x64
#mkdir /var/ftp/pub/centos6.9_x64
#mount CentOS-7-x86_64-DVD-1611.iso /mnt/
#cp -r /mnt/* /var/ftp/pub/centos7.2_1511_x64
#umont /mnt
#mount CentOS-7-x86_64-DVD-1611.iso /mnt/
#cp -r /mnt/* /var/ftp/pub/centos6.9_x64


將 Linux PXE 開機核心檔案,放置於 tftp Server 分享目錄上:

#cd /var/ftp/pub/centos7.2_1511_x64/images/pxeboot
#cp vmlinuz initrd.img /tftpboot/centos7.2_1511_x64
#cd /var/ftp/pub/centos6.9_x64/images/pxeboot
#cp vmlinuz initrd.img /tftpboot/centos6.9_x64

在ftp 目錄下建立Linux Kstart 檔案

1. var/ftp/pub/centos7.2_1511_x64/ks.cfg

#version=DEVEL
# System authorization information
auth --enableshadow --passalgo=sha512
# Use CDROM installation media
#Linux OS IOS位置
url --url="ftp://192.168.x.x/pub/centos7.2_1511_x64"
# Use graphical install
graphical
# Run the Setup Agent on first boot
firstboot --enable
ignoredisk --only-use=xvda
# Keyboard layouts
keyboard --vckeymap=us --xlayouts='us'
# System language
lang en_US.UTF-8

# Network information
network  --bootproto=dhcp --device=eth0 --onboot=no --noipv6
network  --bootproto=dhcp --device=eth1 --onboot=yes --noipv6
network  --hostname=dhcpdclient.wegames

# Root password
rootpw --iscrypted $6$TXQDofxdXufoq$L.TIvt8IdzvbfTGUNf3zqbIDqr.Y.NOiJk0ZubdBlw.Dq7VYipq.
# System services
selinux --disabled
services --disabled="chronyd"
# System timezone
timezone Asia/Taipei --isUtc --nontp
# System bootloader configuration
bootloader --append=" crashkernel=auto" --location=mbr --boot-drive=xvda
# Partition clearing information
clearpart --none --initlabel
# Disk partitioning information
#配置/boot  swap2G,其餘/
part /boot --fstype="xfs" --ondisk=xvda --size=500
part swap --fstype="swap" --ondisk=xvda --size=2049
part / --fstype="xfs" --ondisk=xvda --grow --size=10240 --maxsize=1024000
repo --name="CentOS7.2_1511_x64"  --baseurl=ftp://192.168.199.1/pub/centos7.2_1511_x64 --cost=100

#最小安裝
%packages
@^minimal
@core
kexec-tools

%end
%addon com_redhat_kdump --enable --reserve-mb='auto'
%end
#安裝完後重開機

reboot

#進行安裝完後的套件環境配置
%post --log=/root/postinstall.log

systemctl stop NetworkManager
systemctl disable NetworkManager
systemctl stop firewalld
systemctl disable firewalld
/etc/init.d/netword restart
chkconfig network on

yum install epel-release wget net-tools net-snmp ntpdate vim  -y

yum update glibc bash openssl -y


cp /etc/snmp/snmpd.conf /etc/snmp/snmpd.bk
cat /dev/null > /etc/snmp/snmpd.conf
echo "rocommunity testmonitor x.x.x.x" > /etc/snmp/snmpd.conf
echo "rocommunity testmonitor  x.x.x.x" >> /etc/snmp/snmpd.conf
systemctl enable snmpd

ntpdate ntpserver && hwclock -w
echo "59 11 0 0 0 root ntpdate ntpserver && hwclock -w" >> /etc/crontab
echo "#GATEWAY=x.x.x.x" >> /etc/sysconfig/network
echo "#nameserver 168.95.1.1" > /etc/resolv.conf
echo "#nameserver 8.8.8.8" >> /etc/resolv.conf
%end


2. var/ftp/pub/centos6.9_x64/ks.cfg

#version=DEVEL
install
#text
#Linux OS IOS位置
url --url="ftp://192.168.x.x/pub/centos6.9_x64"
lang en_US.UTF-8
keyboard us
network --onboot yes --device eth1 --bootproto dhcp --noipv6
rootpw --iscrypted 
$$TXQDCvxdXufoT8IdXCzvbfTGUNf3zqbIDqr.Y.NOiJk0ZubdBlw.Dq7VY
authconfig --enableshadow --passalgo=sha512
selinux --disabled
timezone Asia/Taipei
bootloader --location=mbr --driveorder=sda,xvda --append="crashkernel=auto rhgb quiet"
# The following is the partition information you requested
# Note that any partitions you deleted are not expressed
# here so unless you clear all partitions first, this is
# not guaranteed to work
#clearpart --linux --drives=sda
zerombr
clearpart  --all
part /boot --fstype=ext4 --size=200
part swap --fstype="swap" --size=2048
part / --fstype=ext4 --grow --size=10240 --maxsize=1024000
repo --name="centos6.9_x64"  --baseurl=ftp://192.168.x.x/pub/centos6.9_x64 --cost=100
reboot

#最小安裝
%packages
@base
@core
@server-policy
sgpio

#進行安裝完後的套件環境配置
%post --log=/root/postinstall.log
/etc/init.d/iptables stop
chkconfig iptables off
yum install epel-release wget net-snmp ntpdate vim  -y
yum update glibc bash openssl -y
cp /etc/snmp/snmpd.conf /etc/snmp/snmpd.bk
cat /dev/null > /etc/snmp/snmpd.conf
echo "rocommunity testmonitor" x.x.x.x" > /etc/snmp/snmpd.conf
echo "rocommunity testmonitor" x.x.x.x >> /etc/snmp/snmpd.conf

chkconfig snmpd on
ntpdate x.x.x.x && hwclock -w
echo "59 11 0 0 0 root ntpdate x.x.x.x && hwclock -w" >> /etc/crontab
echo "#GATEWAY=x.x.x.x" >> /etc/sysconfig/network
echo "#nameserver 168.95.1.1" > /etc/resolv.conf
echo "#nameserver 8.8.8.8" >> /etc/resolv.conf

編寫 PXE Server 開機選單:

/tftpboot/pxelinux.cfg/default

default menu.c32
prompt 0
timeout 300
MENU Wegames G12 PXE Menu

#選單一,預設硬碟開機
LABEL local
  MENU LABEL Boot from local drive
  MENU DEFAULT
  localboot 0

#選單二 ,CentOS7
LABEL CentOS7.2_x64
MENU LABEL CentOS 7.2.1511 X86_64_VM
KERNEL /centos7.2_1511_x64/vmlinuz
APPEND initrd=./centos7.2_1511_x64/initrd.img inst.repo=ftp://192.168.x.x/pub/centos7.2_1511_x64/ ks=ftp://192.168.x.x/pub/centos7.2_1511_x64/ks.cfg ksdevice=eth1

#選單三,CentOS6.9
LABEL CentOS6.9_x64
MENU LABEL CentOS 6.9_x64_VM
KERNEL /centos6.9_x64/vmlinuz
APPEND initrd=./centos6.9_x64/initrd.img inst.repo=ftp://192.168.x.x/pub/centos6.9_x64/ ks=ftp://192.168.x.x/pub/centos6.9_x64/ks.cfg ksdevice=eth1


更正tftpserver正確權限


#chmod 755 /tftpboot
#chmod 755 /tftpboot/centos7.2_1511_x64
#chmod 755 /tftpboot/centos6.9_x64

#chmod 755 /tftpboot/pxelinux.cfg
#chmod 644 /var/ftp/pub/centos7.2_1511_x64/ks.cfg
#chmod 644 /var/ftp/pub/centos6.9_x64/ks.cfg


啟動各項服務:


#systemctl enable vsftpd
#systemctl start vsftpd
#systemctl enable tftp
#systemctl start tftp
#systemctl daemon-reload
#systemctl enable dhcpd

#systemctl start dhcpd

2017年6月13日 星期二

FortiGate140D練習

環境:
FortiGate 140D (v5.2.10,build742)


1.針對WAN1 , WAN2 作HA機制


⧭假設WAN1 為Hinet線路 , WAN2 為FET線路

a. 設定好WAN1 , WAN2 外網IP


b. 配置對外Staic Route
(主要線路為Wan1 , 權重為0 , Wan2權重為10 ,權重越低優先權越高)

Gateway需配置)
                                   

c.配置WAN HA(權重都是1, 不論Wan1 or Wan2斷線都會互相切換 )


2. 強制內網走非預設的WAN2出去 (內網為Port1 , Port2)


a. 假設port2網段為192.168.12.0/24
    Client ip = 192.168.12.101

b. 配置Policy Route

Gateway需配置Wan2的


c. 配置Port2 ------> Wan2 規則


3. IP Mapping , Port Mapping


a. 配置對應表

外網1.2.3.5 對應到內網的192.168.10.105
外網1.2.3.5 port 3389 對應到內網的192.168.10.105 port 3389

b. 定義Wan --->Lan 規則 , 目的地填入 上述新建的對應表(Virtual IP) , 需開放的Port


4. FortiAP配置

a.配置FortiAP介面(port 34-36,Software Switch 綁定一起)

配置192.168.133.1 為介面IP , 並啟用DHCP 發給AP
FMG-Access 和CAPWAP 要勾選

b, 認證AP

新接上的AP的項目會是灰底 , 需要透過認證才能使用轉換成白底
c. 配置SSID

配置兩個SSID , 並啟用DHCP

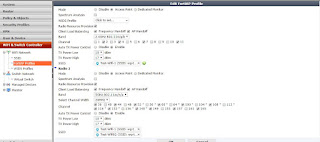
d.配置FortiAP Profile

配置2.4 GHz和 5 GHz設定-上述SSID

e. 調整FortiAP所使用的Profile

選擇上數設定過的Profile , 過個3-5分鐘就可以搜尋到新的SSID

f.配置Wifi SSID -----> Wan 的規則
(若不要走預設路由 , 使用Policy Route更改路由)


5. 配置SSL VPN

a. 新增VPN的使用者和群組


b. 配置SSL VPN portal (下列是用預設的Full_Access來改的)

新增預設的SSLVPN_TUNNEL_ADDR1

c. 配置SSL VPN Setting

Wan1,Wan2都可以撥入SSLVPN , Port修改為10443

限制除了SSLxxx_Group以外的人吃web_Access

d. 配置防火牆規則ssl.root -----> Lan  或是其他介面
    即可測試撥入SSLVPN


2017年6月8日 星期四

Cisco2960x StackWise

環境
WS-C2960X-48TS-L  *  2

🔻檢查Stack環境


1. 檢查韌體版本是否相同

show version

Switch Ports Model                     SW Version            SW Image
------ ----- -----                     ----------            ----------
   *1 Master    WS-C2960X-48TS-L          15.2(2)E6             C2960X-UNIVERSALK9-M


2. 檢查stack速度是否相同

show switch stack-ring speed

Stack Ring Speed        : 10G
Stack Ring Configuration: Full
Stack Ring Protocol     : FlexStack


3. 檢查stack manger 版本是否相同

show platform stack manager all

                Stack State Machine View
==============================================================

Switch   Master/   Mac Address          Version    Current
Number   Member                          (maj.min)  State
-----------------------------------------------------------
1        Master   00xa.dx8x.fc80          1.56        Ready


🔻配置Master環境


1, 指定較高權重 , 就能指定master

xxxx(config)#switch number priority  15

xxxx(config)#do wr


2. show switch 可以確認

                                           H/W   Current
Switch#  Role   Mac Address     Priority Version  State
----------------------------------------------------------
 1       Master 00xa.dx8x.fc80     15     4       Ready


🔻配置Member環境


1, 指定較低權重 (預設為1)

xxxx(config)#switch number priority  1

xxxx(config)#do wr


2. show switch 可以確認 (switch number需錯開)

                                           H/W   Current
Switch#  Role   Mac Address     Priority Version  State
----------------------------------------------------------
 2       Master 00xa.dx8x.fc80     1     4       Ready


🔻配置Stack線路

交錯插入

example1:   sw01  stack port1 ------> sw02 stack port2

                   sw01  stack port2 ------> sw02 stack port1


example2:   sw01  stack port1 ------> sw02 stack port2

                   sw02  stack port1 ------> sw03 stack port2
       
                   sw03  stack port1 ------> sw01 stack port2


⧭拔電重啟Member主機 , 兩台sw會根據權重選舉Master


                                           H/W   Current
Switch#  Role   Mac Address     Priority Version  State
----------------------------------------------------------
 *1       Master 00xa.dx8x.fc80      15     4       Ready
   2       Member 00xa.dx8x.fd80     1      4       Ready


➤備註1
當Member壞掉時 , 更換主機需要先把第三台switch number換成壞掉的Member Switch number
重啟後需要再 no switch old-number provision  , 接上線路後重啟就可以回復原先Member Switch的設定

Switch#  Role   Mac Address     Priority Version  State
----------------------------------------------------------
  1       Member 0000.0000.0000      0     0       provisioned
   *2       Master 00xa.dx8x.fd80     1      4       Ready


➤備註2-參考網址
http://www.cisco.com/c/en/us/td/docs/switches/lan/catalyst3750/software/troubleshooting/switch_stacks.html

2017年6月7日 星期三

WordPress On CentOS6.8

環境:
CentOS6.8 64bit
Apache 2.2
MYSQL5.6
PHP5.6
PHP-FPM5.6
WordPress


🔻安裝epel軟體源 

yum install epel-release -y


🔻系統安全性更新 

yum update glibc bash openssl sudo -y 


🔻安裝php5.6 // percona mysql 軟體源

rpm -Uvh http://mirror.webtatic.com/yum/el6/latest.rpm

rpm -Uvh http://www.percona.com/downloads/percona-release/redhat/0.1-4/percona-release-0.1-4.noarch.rpm


🔻安裝apache2.2 // php5.6 // php-fpm5.6

yum install php56w.x86_64 php56w-devel php56w-xml.x86_64 php56w-gd.x86_64  php56w-mbstring.x86_64 php56w-mcrypt.x86_64 php56w-mysql.x86_64 php56w-pdo.x86_64 php56w-opcache.x86_64 php56w-fpm -y 


🔻安裝percona mysql 5.6

 yum install Percona-Server-server-56.x86_64 Percona-Server-devel-56.x86_64 Percona-Server-client-56.x86_64 Percona-Server-shared-56.x86_64 -y 


🔻安裝apache mod_fastcgi

yum install mod_fcgid.x86_64 -y

🔻修改php.ini

date.timezone = Asia/Taipei

🔻修改/etc/php-fpm.d/www.conf 

註解
#listen = 127.0.0.1:9000

新增
listen = /var/run/php56-fpm.sock

啟動
/etc/init.d/php-fpm start

開機啟動
chkconfig php-fpm on

🔻在 /etc/httpd/conf.d/fcgid.conf  新增php-fpm設定

新增
<IfModule mod_fastcgi.c>
  ScriptAlias /fcgi-bin/ /usr/bin/
    AddType application/x-httpd-php .php
    AddHandler php-fastcgi .php
    Action php-fastcgi /fcgi-bin/php-cgi
    FastCgiExternalServer /usr/bin/php-cgi -socket /var/run/php56-fpm.sock
</IfModule>


啟動
/etc/init.d/httpd start

開機啟動
chckocnfig httpd on 


🔻使用php info測試服務是否正常

cd /var/www/html/

ehco "<?php
phpinfo();
?>
" > test.php

訪問 http://yourip/test.php

看是否能夠訪問到頁面

🔻安裝wordpress

1. 設定mysql

啟動
/etc/init.d/mysql start

開機啟動
chkconfig mysql on 


2. 設定wordpress資料庫和權限

mysql -uroot -p 

CREATE USER wordpressuser@localhost;

SET PASSWORD FOR wordpressuser@localhost= PASSWORD("password");

GRANT ALL PRIVILEGES ON wordpress.* TO wordpressuser@localhost IDENTIFIED BY 'password';


3. 設定wordpress

 yum install wget
  
wget http://wordpress.org/latest.tar.gz

mkdir /wordpress

tar zxvf latest.tar.gz -C /tmp

cp /tmp/wordpress/wp-config-sample.php /tmp/wordpress/wp-config.php

cp -rf /tmp/wordpress/* /wordpress

將資料庫帳密填入wp-config.php 

訪問http://example.com/wp-admin/install.php即可開始配置wordpress


🔻Apache SSL配置


🔻Apache , PHP 安全性配置


.........待續


參考網址:
https://www.digitalocean.com/community/tutorials/how-to-install-wordpress-on-centos-6--2
https://serverfault.com/questions/663294/how-to-configure-php-fpm-for-php-5-6-and-apache-2-2